Sunday, September 19, 2010
Configuring Dynamic DNS!
If your server is already in the Internet don't care about it.
In my case, server is staying in my home. So I need to use Dynamic DNS Resolution Service. You have many choice of this service, i used DynDNS.org
First you need to register to this site and get those services.
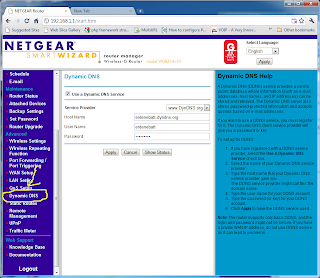
Second configure your dynamic Domain Name on your rooter!
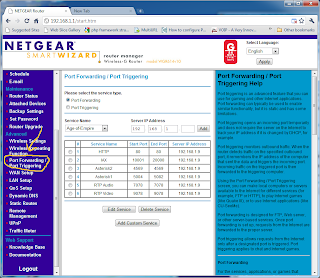
Third configure port forwarding on your rooter
After all you need to configure Dynamic DNS in your Asterisk using sip_nat.conf
Write inside the sip_nat.conf:
externhost=yourdomain.dyndns.org;
externrefresh = 5;
localnet=192.168.1.0/255.255.255.0;
nat=yes;
And of course restart Asterisk!
Read More about Dynamic DNS in Asterisk
In my case, server is staying in my home. So I need to use Dynamic DNS Resolution Service. You have many choice of this service, i used DynDNS.org
First you need to register to this site and get those services.
Second configure your dynamic Domain Name on your rooter!

Third configure port forwarding on your rooter

After all you need to configure Dynamic DNS in your Asterisk using sip_nat.conf
Write inside the sip_nat.conf:
externhost=yourdomain.dyndns.org;
externrefresh = 5;
localnet=192.168.1.0/255.255.255.0;
nat=yes;
And of course restart Asterisk!
Read More about Dynamic DNS in Asterisk
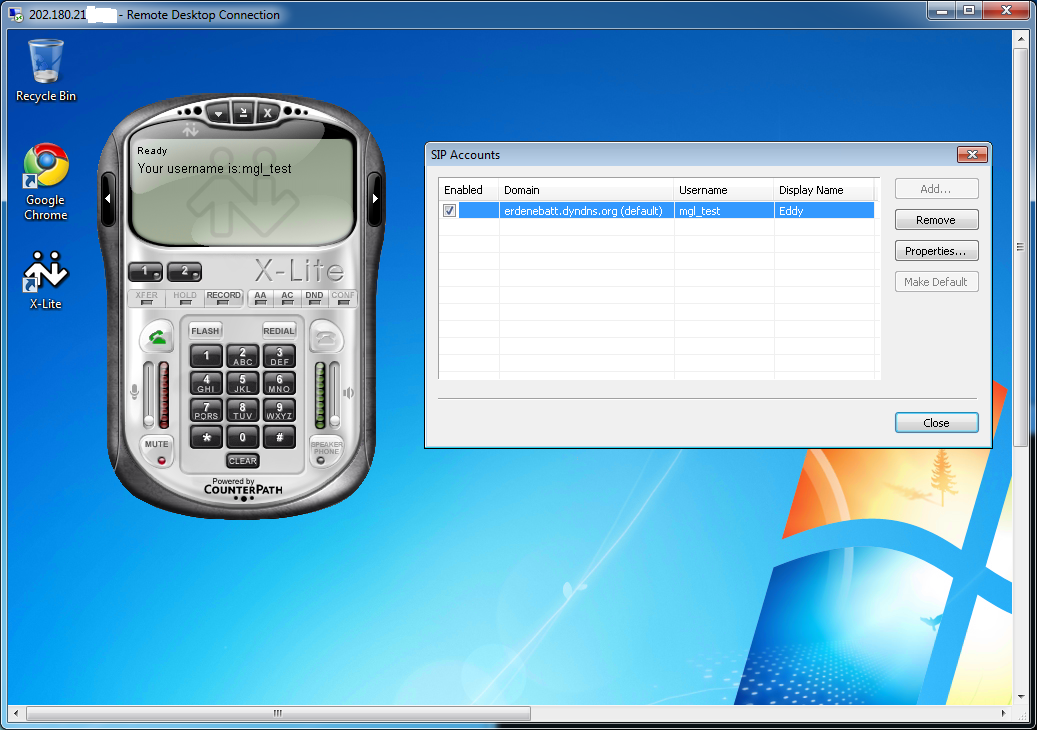
Testing Asterisk Server /Call to each other/
Ringing each other.


This is a complete test of our Asterisk Server is running.


This is a complete test of our Asterisk Server is running.
Testing Asterisk Server /Connect to the Server/


Configuring Asterisk Server!
1. Editing sip.conf
Adding SIP client of Asterisk Server
[test]
type=friend
username=test
secret=password_test
host=dynamic
context=tutorial
[eddy]
type=friend
username=eddy
secret=password_eddy
host=dynamic
context=tutorial
2. Editing extensions.conf
Attaching Dial numbers to SIP Client
[tutorial]
exten => 4321,1,Dial(SIP/test)
exten => 8888,1,Dial(SIP/eddy)
3. Editing iax.conf
[test_iax]
type=friend
username=test_iax
secret=test
host=dynamic
context=tutorial
All configuration files in /etc/asterisk. Don't forget to restart asterisk server after the changes.
Installing PSTN Server!
1. Download Asterisk latest version from http://www.asterisk.org/.
2. Gently follow the Asterisk Installation Guide.
After correct installation you should see
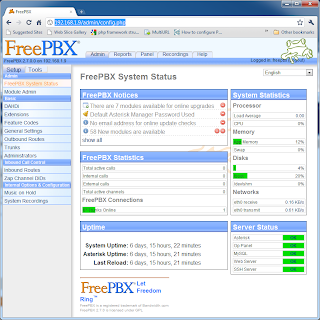
This is the Asterisk Public Telephone Server's Control Panel!
2. Gently follow the Asterisk Installation Guide.
After correct installation you should see

This is the Asterisk Public Telephone Server's Control Panel!
Subscribe to:
Posts (Atom)